3D-Coat development process

I am Andrew Shpagin, the developer of 3D-Coat. This is my personal blog devoted to the development of 3D-Coat. This blog is created to give fast and non-official information about 3D-Coat. I will post there daily news, what I am doing now, what features are under development this moment. It could be really interesting for everyone who is interested in 3D-Coat.

Friday, January 4, 2008

Texture baking tutorial

I want to tell several words why baking tool is so important. Baking tool is especially important if you want to get a texture for low-poly mesh as a result. Let us take for example sphere and draw the strip over it like it is shown below:
Then we should go to sculpt tool and distort it slightly using drag tool:


Then we should enter into low-poly mode. What will you see?


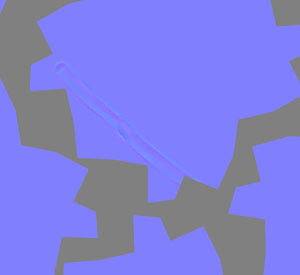
It is because you have distorted geometry, but texture is not distorted, so mesh looks improperly in low-poly mode. In thins case baking tool can help you. You should project new high-poly distorted mesh onto low-poly mesh. In this way you will get distorted textures. Please compare the result of usual export of normalmap texture with result of baking tool:


Simple export result:

Baking tool result:
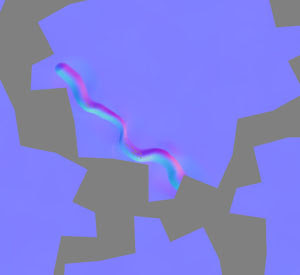
The differene is obvious - you have got the correct normal map using baking tool. The options for taking that normalmap are below:

[x] Use current low-poly mesh...
[ ] Use original positions ...
[ ] Smooth mesh

The options should be other if you need displacement:

[x] Use current low poly mesh
[ ] Use original positions...
[x] Smooth mesh
[x] Preserve positions ...

But the result will be better if you don't need displacement and need only normalmap. It is because of getting displacement is not trivial operation and mesh should be smoothed before. It is required because the displacement is difference between mesh and smoothed surface. I think that simple example shows you why baking tool is so important.

Thursday, January 3, 2008

Happy new year!

At least I have made the texture baking tool. Now you can project current mesh on another mesh and get textures of color, specular, normalmaps and displacement forr that mesh. It works fast, the baking takes almost the same time like simple texture saving. It uses multiple processors if you have it. Why do you need texture baking?

1) To get correct displacement maps even in case when you have dragged surface in sculpt tool.
2) Sometimes you need to change topology or uv-set of mesh. For example you need to simplify mesh and get textures for simplified mesh. In this case you can use texture baking.
How to use it? The screenshot of that tool is below:

To get displacement map you should set "Smooth" option because displacement is calculated like difference between object in scene and smoothed input mesh. If you want to project on current mesh you should check option "Use current low poly mesh...". In this case it is better to check options "Use original positions..." and "Smooth mesh" if you want to get displacement and uncheck them if you want only normalmap.

I have uploaded the new version there:

www.3d-brush.com/files/3d-brush-2-03-sp2-en.exe


Tuesday, December 25, 2007

Merry Chrismas!


Several days ago I have got to know that I can buy Space mouse ( http://www.3dconnexion.com/ ) in Ukraine. Many peoples asked me to make the support of that divice, so I have decided to buy it. The price was twice but anyway we have decided to buy it. But when we have come to that shop, they proposed us to take it for testing without any payment. In so way yesterday I have got Space Traveler. I was excited by that device, I have understood that it could be used not only for navigation but also for parameters variation. It has 6 degrees of freedom, so I can change 6 parameters. It could be really useful for 3D-Brush users. So, in couple of hours I have made navigation support - it was extremely easy. I like it! Several hours more - and variation of parameters was done. If you will press the key on space mouse it enters into vary mode (the icon on the top shows that you are in that mode). You can see it below:
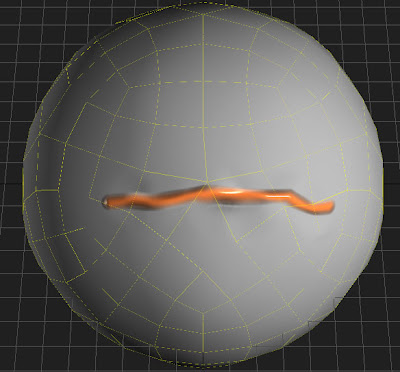
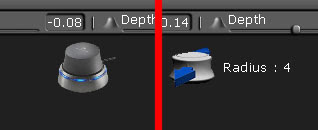
The right picture shows what will happen if you will push the ball forward. In so way you can change:

Radius - zoom forward/back
Depth - pan vertically
Opacity - pan horizontally
Rotate pen - spin
Focal depth - tilt
Specularity - roll

I was excited with that, I like new navigation and how easy now to change pen parameters. I have decided to post new version. There was some other interesting changes. Now you can select several pen shapes simultaneously and paint with random pen. Also yo can store it into new presets window. In so way you can make hairs or skin details in very easy way. The screen below shows how looks multiple selection and presets panel:


Have a joy!

Friday, December 21, 2007

I have done the new version, 2.02 SP3. It is in beta state, but I think it is stable enough. The link is below:http://www.3d-brush.com/files/3d-brush-2-02-sp3-en.exe
Now I am working over feature requests. Recently the FBX import was done. It is important because it saves properly the smoothing groups. 3D-Max <9.0 and Maya are not able to export correct OBJ files with smoothing groups, so FBX import is important for MAX & Maya users. 3DMax 9 is able to export/import correct OBJ files, but not everyone have Max 9.0.

The other important feature - ability to export low-poly meshes with original positions of vertices. It is mostly important for users that use Auto-mapping.

The pallette window is now resizable and can be closed if necessary.

The new important feature - presets window. You can store there full state of pen shape / radius / depth / strip shape / material / filler / color / smooth and restore that settings any time by one click. It can speed up work much.

The new navigation bar is implemented, it can be useful for those peoples who use pen.

The old annoying bug is fixed - undo in line mode was sometimes incorrect.

Some peoples had a problem with input dialog - it also was fixed.

The update is coming soon! Please vote in right panel.

Wednesday, December 12, 2007

2.02 is done! You can read about list of changes on site http://www.3d-brush.com/. I want to tell there mostly about two new features - topologocal symmetry and quick uv - mapper.
1) The topological symmetry.
If object have symmetrical polygons structure, the topological symmetry tool could be very useful. It does not requires that object should have geometrical symmetry. You need to pick two symmetrical faces to define that symmetry. It is something like tangent symmetry in Mudbox, but differennce is that in 3DB starting faces could be not adjacent. For examle, if you have two disconnected objects, like eyes or seats in car, you can define that symmetry anyway. But now you can not draw directly with that symmetry, you can flip layer, duplicate with symmetry or copy from one part of layer to other using that symmetry. May be it is good, because there will be less lags during painting :)
2) Quick UV-mapper
It is experimental tool, this is not fully-functional, complex mapper. It is very simple, but I hope very convinient tool. The main idea - to make uv-mapping interactive and quick. Every cluster will be unwrapped using LSCM unwrapping algoritm. When yo mark new seam or new cluster 3DB unwraps new clusters in realtime and shows you the preview of unwrapped cluster immediately, so that you can see the degree of distortion of every part. You can see in realtime when new clusters will appear, so you will not be able to forget some seam before unwrapping. You can see below the screenshot of this tool in action:
There is 3 modes in this tool: mark centers of clusters, mark seams, mark edge loops. In the last two modes you can mark seams by click and unmark them with CTRL+click. The first mode is something new. You can mark centers of clusters like it is shown on the screenshot:


The next milestones - I want to implement FBX support, texture baking, space mouse support (if I will be able to buy it) May be someone can send to me that mouse? It is so difficult to get it in Ukraine!

Thursday, December 6, 2007

I have made new tool - topological symmetry. Sometimes models have no geometrical symmetry, but polygons structure is symmetrical. If it is so you can flip some layer or duplicate layer with symmetry flipping. To define the topological symmetry you should select two faces in that tool. It is better if they are adjacent. But it is not strictly required. They both should be symmetrical to each other.

Also I am working over quick-uv tool. It was done on 60% month ago and then freezed. Now I have decided to finish it, because it could be really useful to perform quick and easy model unwrapping. I think that today or tomorrow I will finish all that stuff and upload the new update.

Also 3D-Brush will become multilingual. Now there is new menu item - Language. You can select 3 languales - english, russian or chinese. It is very easy to add new localisations. So if you want to see 3D-Brush on your native language, yo can help us in this question.

Many bugs was fixed and feature requests was done.

So, please wait for the new update - 2.02 is coming soon!