3D-Coat development process
Thursday, May 29, 2008
Development progress
Monday, May 26, 2008
Do you want to see 3D-Coat on your native language?
http://www.3d-coat.com/lang_translation.php
It requires login/password from forum. If you want to see more languages, please write me directly. Also, you can ask questions in our forum
http://3dbrush.kriska.hvosting.net/forum/index.php?showtopic=1093
Thank you for participation!
Saturday, May 17, 2008
MacOS porting progress
Friday, May 16, 2008
3D-Coat 2.09!
http://3dbrush.kriska.hvosting.net/forum/index.php?showtopic=1073
3D-Coat SDK
I have published 3D-Coat SDK. It allows to create plugins for export/import of different 3D-files. To start you should download and unpack
http://www.3d-coat.com/files/3D-CoatSDK.rar
Then you shoud open soluton ExportImport.sln. It requires at least MS VisualStudio 2008 Standart Edition to be properly compiled. Compile project. It is better to use “Release” configuration. You will get Odj.DLL file on output. This simple plugin is a sample for importing OBJ files. Obj.DLL should be copied to
$3D-CoatInstallationFolder\Plugins\MeshCodecs\
To understand how plugins work open files cMeshObj.h. You will see there class that is derived from cMeshCodec (It is defined in cIO.h).
class cMeshCodec {
public:
cMeshCodec() {}
virtual ~cMeshCodec() {}
virtual cRawMesh * Decode(const cData &Fm) = 0;
virtual void Encode(const cRawMesh &Mesh, cData *To) = 0;
virtual bool CanEncode(){return true;}
virtual bool CanDecode(){return true;}
};
To create new codec you should derive your class from cMeshCodec and re-define functions Encode and Decode. Decode should return filled object cRawMesh and Encode should fill Data structure cData using cRawMesh. You can look and discover objects cData and cRawMesh. After redefining functions you should change class name in ExportImport.cpp. I think it is very easy. The only not so easy task is filling/reading structure cRawMesh. It is mesh that consists of:
uv-sets (see GetUVSets() )
Matrials(surfaces) (see GetMaterials() )
Objects (see GetObjects() )
PositionVertices (see GetPositions() )
UV-vertices (see GetTexCoords() )
Normals (see GetNormals() )
Faces (see GetRaw() )
To understand how it works it is better to discover how cMeshObj.cpp encodes/decodes obj – files. I will explain slightly how Faces list is organised.
Faces are array of cVec3i – 3 integer values
Count, - amount of polygones in face
idMtl = MaterialIndex + (UV-set index<<16) – index of material and uv-set
idObj - index of object
Next “Count” values are 3-indices of vertices that are part of face
PositionIndex (index in array of position vertices)
TexturevertexIndex (index in array of texture vertices, can be -1)
NormalIndex (index in array of normals, can be -1)
The best method to learn is to ask in forum and discover how cMeshObj is done.
Thursday, May 8, 2008
Translating to many languages
I have interesting idea about translating 3D-Coat to very many languages. I know that many peoples want to help to translate 3DC to native language but it seems too difficult because
1) Too many texts for one man
2) It is not so easy to find where texts are stored
2) There is some xml-file - it is not convenuent to translate
Also, using translation agencies is not effective because they usually don't know CG terminology well.
So we started new web project - you will be able to help to translate even if you have 5 free minutes! There will be web page where you can get string that is not still translated and translate it on native language. There will be small screenshot where this string is used and text. You will be able to type the translated text.
Vector displacement
Now I am making support of export/import of vector displacement. What is vector displacement? You have subdivided mesh and texture for displacement. It is not grey, every channel represents shift in space in corresponding direction (XYZ). Vector displacement is important for sculpting because it allowd to displace sphere into something non-trivial like face. Using vector displacement will make export for render engines much mere easy and precise. There is two types of vector displacement
1) World space vector displacement - RGB in picture mean XYZ shift in space. It is most precise method, but it is not good for animation.
2) Tangent space (local space) displacement - RGB mean shift in TBN - space, N- normal, T,B - directions of U,V gradient. This kind of displacement is good for animation but less precise because tangent space calculation can be made using many methods, it even can be non - orthonormal.
I have almost done this stuff, but I have a problem with method of calculation of tangent space in LW or Modo. If someone knows how to do that in Modo/LW, please send me the info.
You can download and test this feature by the link
http://www.3d-coat.com/files/3d-Coat-209B3B-en.exe
I have created the new topic in forum
http://3dbrush.kriska.hvosting.net/forum/index.php?showtopic=1038
Please help in testing vector displacement.
Also, if you have examples of EXR files with vector displacement to transform sphere of some other simple surface into something non-trivial, please send me to support. It will be great help.
Saturday, May 3, 2008
2.09 is coming soon!
3D-Coat 2.09 is almost done. There will be many new features. It will be essentially useful for LW users. The approximalte list of upcoming features:
1) Merging new objects is possible now! You can add new sub objects like eyes on your WIP.
2) Different uv-sets are placed on different textures, it allows you to use display memory more efficiently and get better quality.
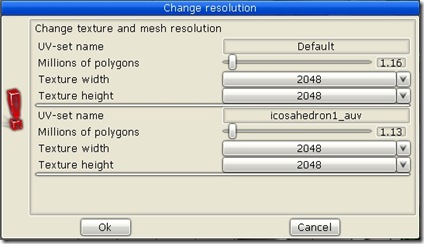
3) You can choose resolution of every uv-set during import and change it any time. Also, you can change resolution of mesh separately for every uv-set.
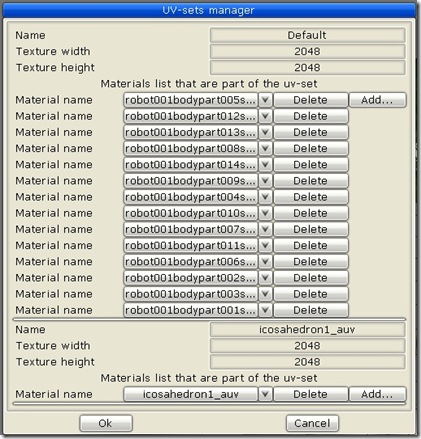
4) Now you can group several materials (surfaces) into single uv-set
5) Select and move now supports symmetry.
6) Gradient select in sculpt mode works better with symmetry and works much better now.
7) Image picker has got navigation controls to scale/move/fit image

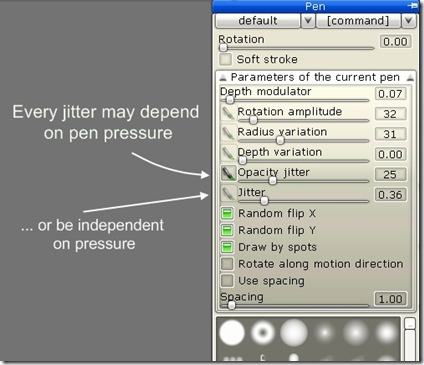
8) Wacom pen has got better support: opacity jitter is add for pen and every jitter can depend on pressure if you want.
9) All textures (color/normals/specular) and all uv-sets could be viewed in single window
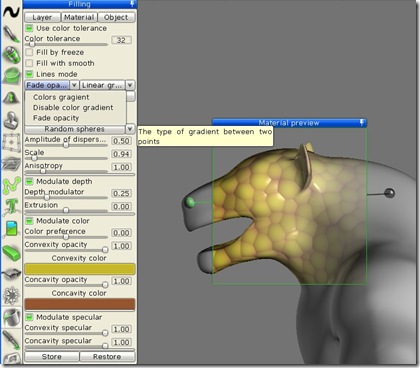
10) New option in fill tool using gradient - filling with opacity fading
11) ... and filling with spherical gradient
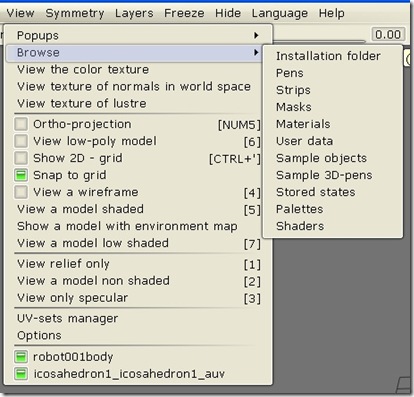
12) New menu item - View->Browse to understand the structure of 3DC folders better
13) Move along motion in pen settings now works with symmetry
14) Stability improvements
15) It is possible to tweak uv-set in View texture mode. You can do it using RMB in wireframe mode.
16) Now you can edit not only in 3D, but in UV-plane! It is really complex change. Almost all tools support work in 2D and 3D. Just open View->View color texture and see how it works.
17) You can make seamless plane texturing in uv-plane! 3D-Coat now can be used very easily to tile textures and make relief. Just import plane and come to View->View color texture.
18) Hide/unhide/Fill can be applied to texture island (cluster)
19) Additional view mode for texture in UV - layout: shaded model
20) texture editor/viewer is in different movable/resizable window
21) shift - constrains for horisontal/verlical/diaginal movements of the pen. Click on surface and then press SHIFT
23) grids and snap to grid work in 2D - mode also
24) more correct export of texture with multiple uv-sets
25) new nice preview of pens and smart hints
26) it is possible to edit/export/import pens as 16 bit tiffs with 7 cannels - RGBA, Depth, Specular, Erase mask
27) small icons over materials to indicate what layers is in material (depth/color/specular)
28) 2D/3D grid are now in View menu
29) Smudge/collapse/expand tool in paint mode
I hope it will be most powerful update.
Welcome to beta-testing forum at
http://3dbrush.kriska.hvosting.net/forum/index.php?showforum=16

